
Most shrubs that look hopeless are not. They are just three or four years past their last serious trim, and now they have a tangle of dead wood in the middle, crossed branches rubbing against each other, and new growth shooting straight up instead of outward. If you walk up to them with a hedge trimmer and clip everything even, you will remove all the flowering wood, expose raw stubs, and get a flat-sided ball that looks worse than what you started with. What the plant actually needs is a lopper, some patience, and a clear order of operations.
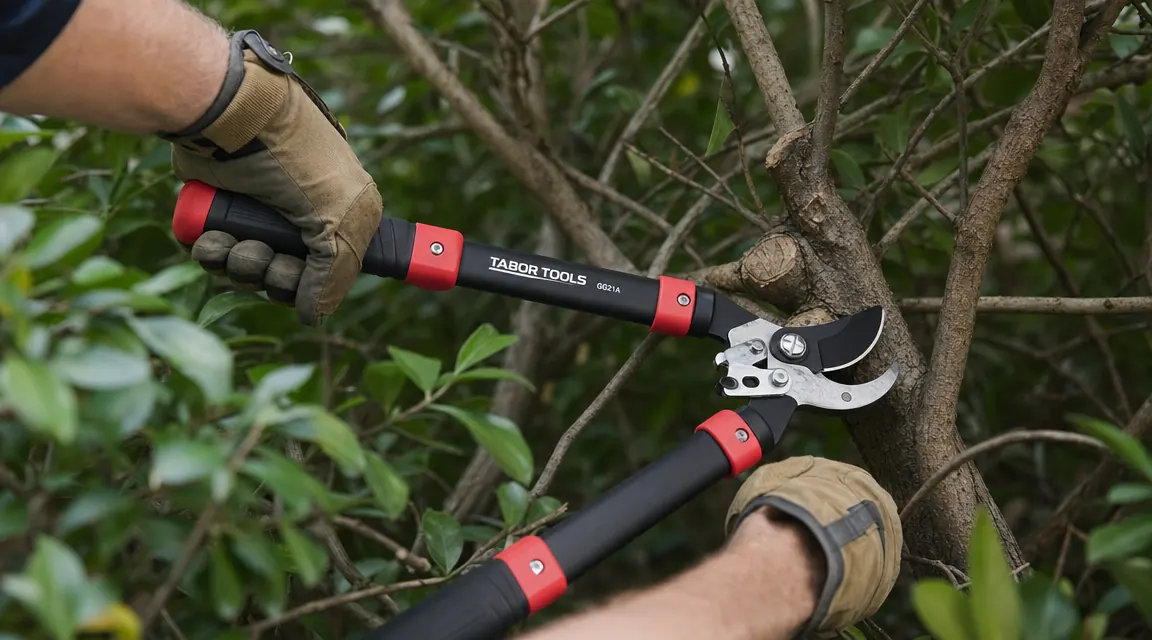
I have brought back forsythia, lilac, viburnum, and old-fashioned mock orange using exactly the process below. None of them were pretty when I started. All of them flowered the following season. The tool that made the difference was the TABOR TOOLS GG21A extendable lopper. At 27 to 40 inches telescoping, it reaches into the center of a six-foot shrub without you climbing into the plant. The compound action handles keep your hands from giving out on the thick cuts. I have run that lopper through two full seasons of cleanup work on my property and my neighbor's overgrown hedge row, and it has not needed sharpening yet. That matters on a job like this, where you are making sixty or eighty cuts in an afternoon.
Your shrubs are not dead. They just need the right tool and the right order of cuts.
The TABOR TOOLS GG21A telescopes from 27 to 40 inches, handles branches up to 2 inches thick, and reaches the crossing wood in the center of an overgrown shrub without you crawling into it.
Amazon Check Today's Price on Amazon →Step 1: Walk the Shrub Before You Cut Anything
Spend five minutes just looking. Walk around the full perimeter and note three things: the natural shape the shrub wants to be, where the dead wood is concentrated, and which stems are crossing or rubbing. Overgrown shrubs almost always have a natural arch or vase form underneath the chaos. Your job is to find it and cut back to it, not to invent a new shape.
Look for these specific problems. Dead wood is easy to spot in spring because it holds no buds and the bark looks dry and gray. Crossing branches are two stems growing toward each other until they touch or rub. Suckers are the straight vertical shoots coming up from the base with no branching. Water sprouts are the same thing but rising from an existing branch instead of the root crown. All four of these come out in Step 2 and Step 3 before you touch the outer canopy.
If the shrub has been neglected for five or more years, you may find that up to half the interior wood is dead or crossing. That is fine. Removing it is exactly what will let light reach the remaining healthy stems and trigger new growth from the base. Do not panic at how open it looks after interior cleanup. Shrubs are resilient in ways that most people underestimate.
Step 2: Remove All Dead Wood From the Inside Out
Set your TABOR TOOLS GG21A to full extension before you go into the interior of the shrub. Forty inches of reach means you can make cuts four to five feet off the ground without bending over and without getting scratched up by the outer canopy. Position the blades just above where the dead stem meets live wood, or at ground level if the whole stem is dead. Make one clean cut. Do not leave a stub longer than a quarter inch above a healthy bud or branch union.
Dead wood cuts easily. If it resists, the stem may still be alive and just struggling. Scratch the bark lightly with your thumbnail. Green cambium underneath means alive. Brown and dry means dead. When in doubt on a borderline stem, leave it for now and come back in a few weeks when new growth makes the verdict obvious.
Drag dead wood out as you go. If you let it pile inside the shrub you will be fighting it on every subsequent cut. I keep a tarp on the ground nearby and toss cut stems onto it as I work. Cleanup takes five minutes instead of thirty.
Step 3: Cut Out Crossing and Rubbing Branches
Once dead wood is cleared, look again at the remaining structure. Identify every pair of branches that cross or rub. One of those two branches needs to come out. Choose the one that is growing in a less favorable direction, the one heading inward instead of outward, or the one that is thinner and weaker. Trace it back to its origin, either a main stem or the ground, and cut it there. Never cut crossing branches in the middle; you will leave two stubs that are both going to sucker and make the problem worse.
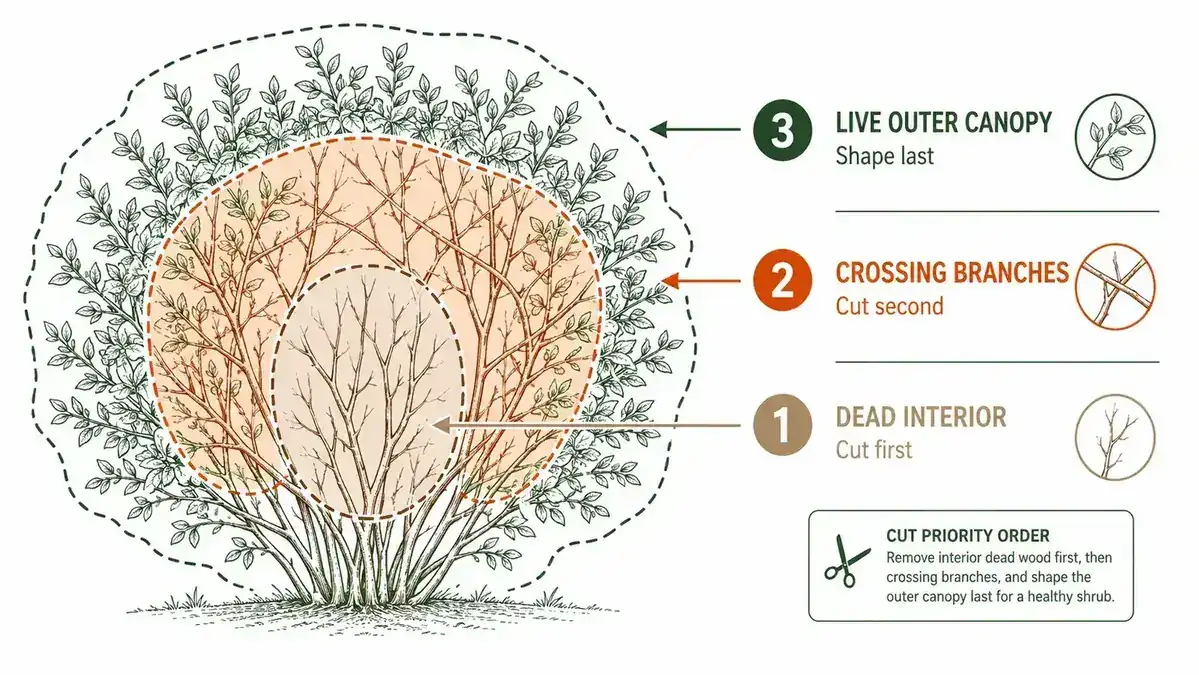
The order you cut matters more than how much you cut. Interior dead wood and crossing branches come out first, every time. The outer shape is last.
Suckers and water sprouts come out at this stage too. Cut them flush to their origin point. Leaving even half an inch of stub causes the plant to push two or three new suckers from that spot. Flush cuts at the branch collar heal cleanly and do not re-shoot the way stubs do. The compound action on the GG21A makes flush cuts easier because you are not fighting the tool to close on a thick stem. The mechanical advantage does the work.
Step 4: Reduce the Overall Height and Width in Stages
After interior cleanup, many shrubs look almost right just from the thinning. Before you reduce height or width, step back and look at the plant again. If it is a spring-blooming shrub like lilac, forsythia, or mock orange, and you are pruning after bloom, you can safely take it down by a third. If you are pruning in late winter before bloom, take it down more conservatively, by about a quarter, or you will cut off this year's flowers.
Make reduction cuts above an outward-facing bud or lateral branch. This is the most important technique in the whole process. Cutting above an outward-facing bud sends new growth outward and maintains the vase shape. Cutting above an inward-facing bud sends growth back into the center, and you will be doing this cleanup again in two years. On large stems where the node spacing is wide, find the nearest outward lateral and cut just above it rather than above a bud.
Work in passes rather than targeting individual stems. Stand at one end of the shrub, make all the cuts at your chosen height, then move around the perimeter. Stepping back after each pass gives you perspective on the shape as it develops. Most gardeners err toward taking too little at this stage out of caution. That is fine. You can always take more. You cannot put it back.
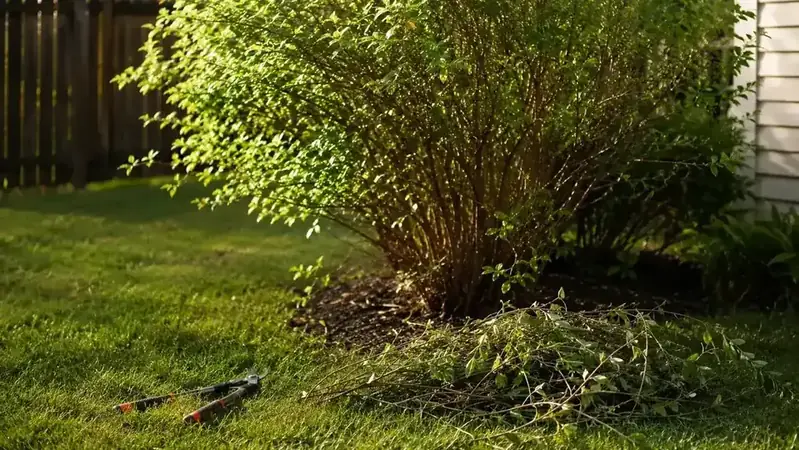
Step 5: Clean Up, Then Leave the Shrub Alone
Pull all cut material out from under and inside the shrub. Leaving debris in place traps moisture and invites fungal problems, especially in shrubs with dense canopies like lilac and viburnum. If you are working in late spring or summer, a light layer of mulch over the root zone helps the plant recover by retaining soil moisture, but keep it a few inches clear of the stems to avoid rot.
Do not fertilize immediately after heavy pruning. The plant is already stressed from losing a significant portion of its canopy. Fertilizing now pushes a flush of weak, sappy growth that is susceptible to aphids and mildew. Wait until you see strong new growth established, typically four to six weeks after pruning, then feed lightly with a balanced granular fertilizer.
Wipe your lopper blades with a rag and a drop of mineral oil before you put them away. The TABOR TOOLS GG21A has a non-stick coating on the blades that resists sap buildup, but a quick wipe after cutting through resinous wood keeps the coating in good shape for the long run. Collapse the telescoping handles before storing, and hang the lopper so the blades are not resting on concrete. That is it. Fifteen seconds of maintenance extends the tool's life by years.
What Else Helps
A good lopper handles branches from roughly three-quarters of an inch up to two inches thick. For stems smaller than that, a bypass pruner makes cleaner, faster cuts. I keep the Felco F5 on my belt for anything under half an inch. The two tools together cover every cut you will make on a shrub renovation job. You are not constantly switching back to the lopper for thin wood or straining the lopper blades on stems that should be pruner cuts.
Thick gloves matter more than most people expect. Overgrown shrubs have dead interior branches that are sharp-ended and brittle, and they break off unpredictably as you reach in with the lopper. A pair of gauntlet-style leather gloves protects your forearms as well as your hands. The work goes faster when you are not constantly pulling back to avoid a jab.
If you are renovating a shrub that is more than eight feet tall, consider doing it over two seasons rather than one. Hard renovation, taking a neglected shrub down by two-thirds, is a real stressor. Some plants handle it fine. Others drop a lot of leaves and look rough for a full year. Spreading the work over two seasons, year one handles the dead wood and crossing branches, year two handles the height and width reduction, gives the plant time to recover between cuts and produces a healthier long-term result.
One tool that reaches inside the shrub without you crawling in after it.
The TABOR TOOLS GG21A telescopes to 40 inches, cuts branches up to 2 inches thick, and the compound action keeps your hands working through a long afternoon of cleanup cuts. Rated 4.8 stars across more than 11,000 reviews.
Amazon Check Today's Price on Amazon →